Logs say Delivered but email has not reached recipient's mailbox
| Situation | The status of an email is Delivered, but it has not reached the recipient's mailbox. The recipient of your outbound message has not received it. |
|---|---|
| Solution | Check the Delivery Response from the message Detail view and use the Message ID to trace the message on the downstream mail server |
Detailed Email Log Entry
There are a number of reasons why an email might not make it to the recipient's mailbox. You can view the Detailed Email Log information by clicking on the Detail option from the UI logs to check the Last Delivery Response. This provides confirmation that the email has been handed off to the downstream mail server.
- On the Dashboard under Tools, click Log Search and search for the message in question
- Under Actions, click Detail icon

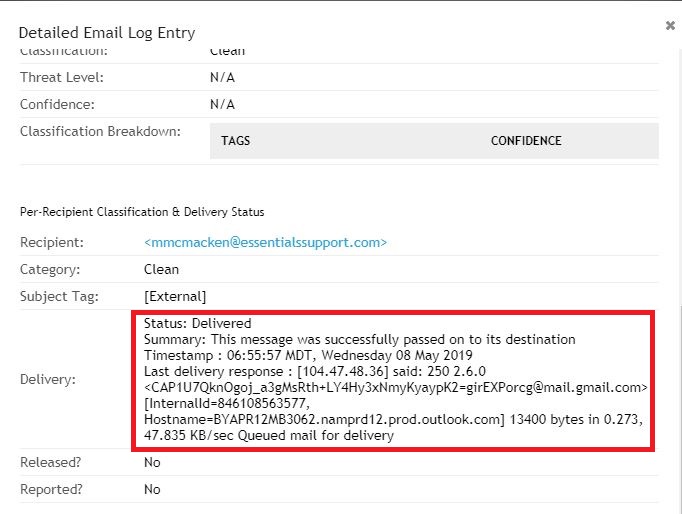
- Scroll down to the section titled Per-Recipient Classification & Delivery Status.
- In the field marked Delivery there will be information, including the Last Delivery Response from the downstream mail server, similar to the below extract:
Status: Delivered
Summary: This message was successfully passed on to its destination
Timestamp : 05:04:07 PDT, Wednesday 08 May 2019
Last delivery response : [104.47.50.36] said: 250 2.6.0 <02f4b098-e4ea-4418-a73d-1b9d7a7be6f1@BY2NAM05FT027.eop-nam05.prod.protection.outlook.com> [InternalId=17557826306613, Hostname=BN8PR12MB3060.namprd12.prod.outlook.com]
The IP or hostname at the last delivery response indicates the server we passed to; if using Office 365 this is vast pool, but if using an another service, it should be the public IP/MX of that system. The 250 hand-off response confirms that the downstream mail server has accepted the message from Proofpoint Essential's dispatch server. At this point, the message is outside of Proofpoint's control. Before using the Internal ID to trace the email, it is worth checking the recipient's junk folder.
Using the Message ID to trace the Email
This trace is specific to Office 365 and will differ depending on the mail server.
Please see this KB for more information: Message Trace in Office 365 and Exchange
From the Office 365 Exchange Admin Center, the Message ID can be used to perform a Message Trace.
- From the Exchange Admin Center, under Mail Flow click Message Trace.
- Use the fields to narrow down the search criteria.
- In the Message ID field, paste the Message ID provided in the Proofpoint Essentials Detailed Log Information.

- Click Search.
- Use the trace results to confirm the delivery status and check the Message Events for potential hold-ups.
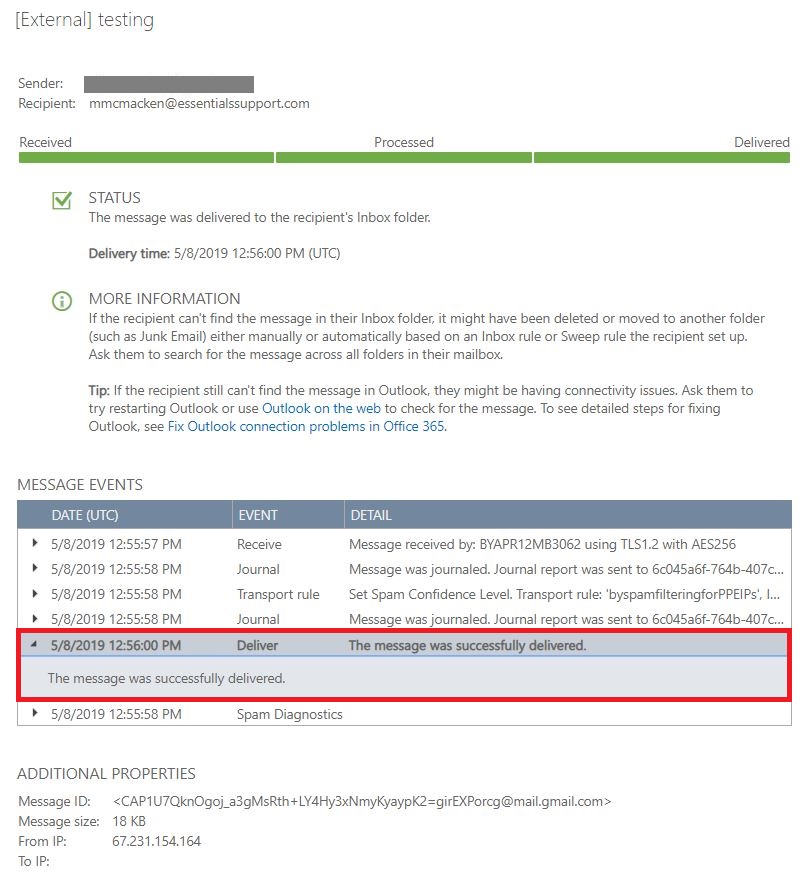
From the mail server's trace, it should show where the message is on the mail server.