How to exempt an account in AD and Azure AD(Microsoft Entra ID) Sync
| Situation | How to Exempt an account in Active Directory (AD) and Azure (Entra ID) Active Directory (AD) Sync |
|---|---|
| Solution | Follow the below steps in the User Management- Import & Sync- Choose either AD or Azure (Entra ID) AD sync |
Overview
AD and/or Azure (Entra ID) AD is Proofpoint Essentials source of truth. Whatever the status is in AD or Azure (Entra ID) AD it should be similar in Proofpoint Essentials. Office 365 syncs with AD and Azure AD (Entra ID) , but does not tell Proofpoint Essentials what to do with the account. To ignore what AD and Azure (Entra ID) says we must exempt the account.
Example- Often a customer stops getting mail. They get errors or bounce backs saying ,"Recipient address rejected: User unknown". Many times, when an Azure (Entra ID) object gets changes to a shared account, this disables the Azure (Entra ID) object. As a result, as mentioned above, Proofpoint is told by Azure (Entra ID) that the account is now disabled. So Proofpoint disables it and mail flow stops. When this happens, we need to re-enable the account and then exempt the account from Sync.
Exempt an Account
Whether it is a user or a functional account these may need to be exempted.
If you are getting repeated notification on the same user you can exempt them. Before exempting the account you should check if the User's email address is listed in multiple location and switching between primary and alias addresses.
New: User Mass Update - Exempt from Sync
We have improved the experience for managing user sync exemptions by allowing admins to directly add users to the sync exemption list directly from the User Management- Users page. Select the user accounts you wish to update. Then check the boxes to the left of the names(s) and then click the Mass Update button.
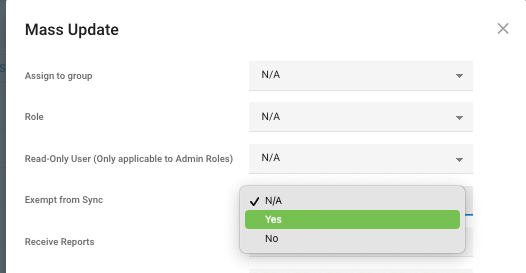
Then Click Update Users button. If you check in your Azure summary, you will now find the account(s) in the exempted area.
AD Sync- Manual way (Old way)
1. Go to Administration > User Management > Import & Sync > Active Directory Sync.
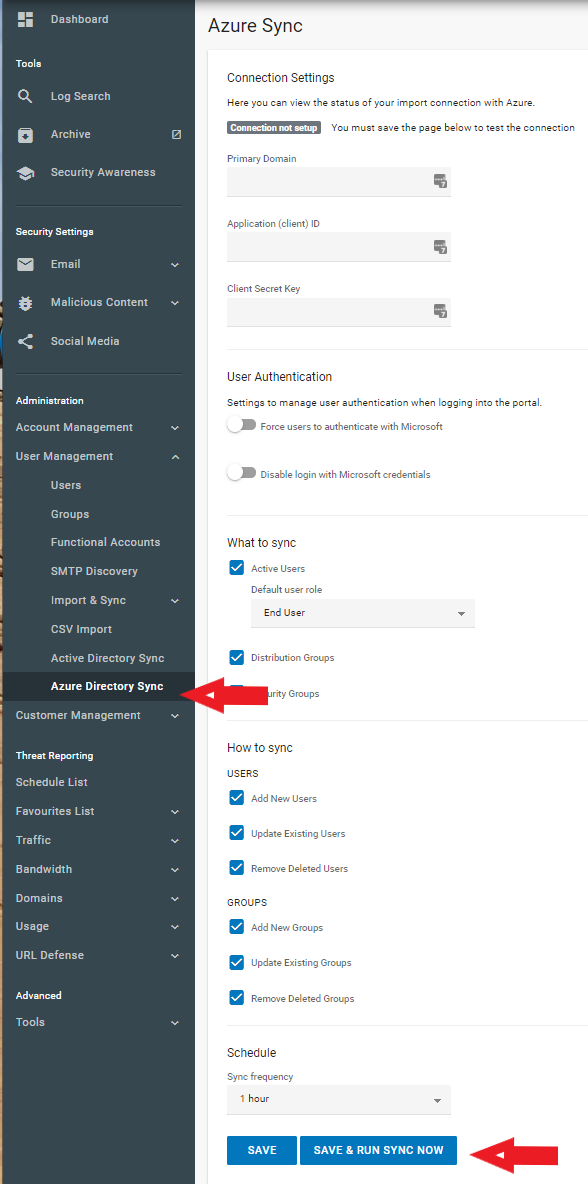
2. Temporarily change the Sync Frequency to Never. (This stops unwanted syncing during these steps.)
3. Click on Search now (AD) or Save and Run Sync Now (Azure).
4. In the AD or Azure (Entra ID) Sync summary, Find the account(s) in the adding area. (This screen is also the same in both AD and Azure- Entra ID)
If the accounts are listed in that area, you can click on the check box to the left of the name(s) and then over to the right side click Exempt from Sync if just one account and Exempt Selected on multiple accounts. 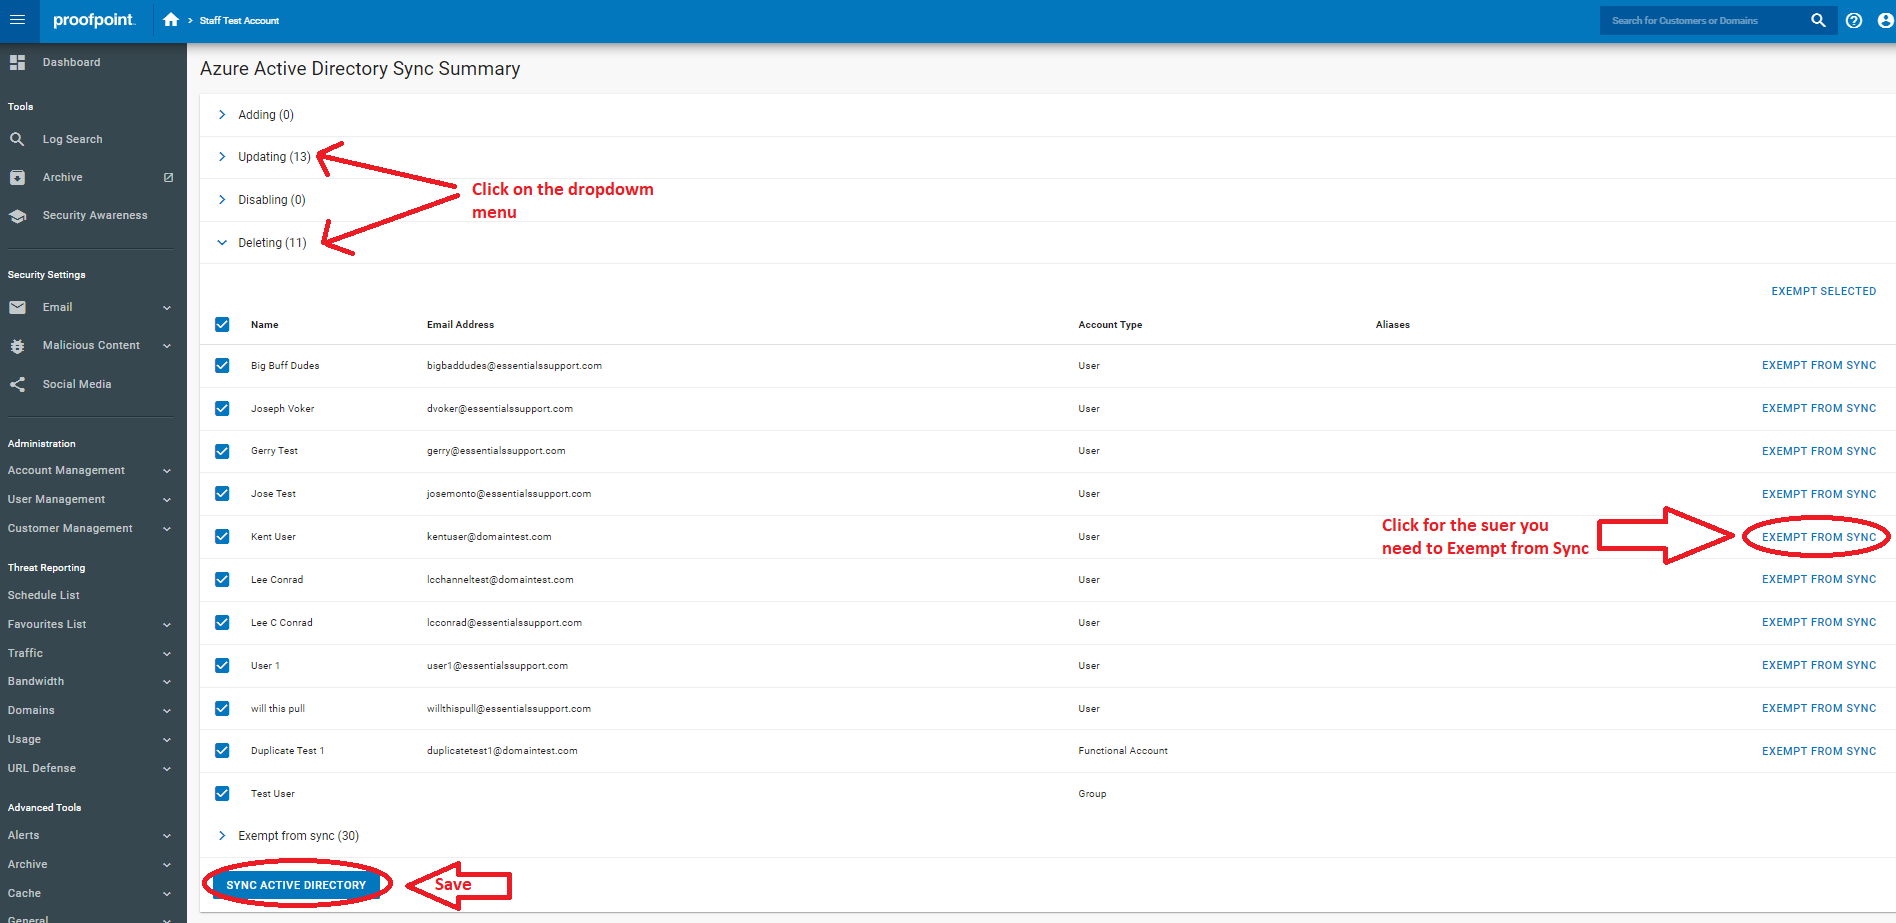
5. If the account(s) are marked as a User account instead of a Functional account- then follow this article to convert it to a Functional Account Adding Functional Accounts Manually (draft).
6. Once that is done, you will find the accounts in the account in the deleting area. This is because AD or Azure (Entra ID) AD is still seeing this as a user account. Expand the Deleting area and mark the box(es) with a check and either select on Exempt From Sync or Exempt Selected for multiple accounts.
7. Remember to change the Sync Frequency back to desired interval.
8. Save your changes.
Once you mark an account Exempt, it will no longer sync on a scheduled AD or Azure sync. It will remain in the state until you delete the account or change the status back to Add to Sync. That will then look to the AD system and follow whatever it says there.
Related Links-