Emergency Inbox
| Situation | During a mail outage when your SMTP server is down, you still want to access to email services, such as sending and replying to messages. |
|---|---|
| Solution |
This article contains information on :
|
This is a standard product feature, and is always on for your protection.
About the emergency Inbox
The Emergency Inbox allows users to send and receive messages if the company mail systems are offline, either for planned maintenance or due to an unexpected outage. During an outage, the Emergency Inbox is automatically populated (spooled) with incoming messages. (It does not show messages that were successfully delivered prior to mail delivery being impacted.) When systems resume functioning, the Emergency Inbox is cleared as messages retry to the mail server.
The Emergency Inbox can be used to send new messages as well as reply to received messages. Once email delivery has been restored any messages that were sent (both new and replies) are automatically delivered to the mail server.
What happens while the server is unreachable
During the outage, Proofpoint Essentials will continue to try and check the customer's mail server, as per the standard set-up. As we are unable to relay the email from our system to the customer's server (as it is down), we are required by RFC to send a deferral notice to the sending mail server that we have been unsuccessful in delivering the email. As long as the customer's mail server is down, we will continue to send deferral messages for some time (we set 30 days) then bounce the message back to the sender. The customer's mail server should be repaired as soon as possible to not lose email.
Emergency Inbox provides access to email in the event that a user's mail environment is unavailable. Once this occurs Proofpoint Essentials automatically begins to spool mail for the affected domain(s) and the Emergency Inbox will immediately show the spooled mail. Users are able to send new messages and reply to received messages. When an email is sent from Emergency Inbox it is treated like any outbound message. The email will show in another internal user’s Emergency Inbox. Users are unable to see messages that were successfully delivered prior to mail delivery being impacted.
How to access Emergency Inbox
In our new interface, the Emergency Inbox has become easier to access.
- Log into the interface.
- Click Emergency Inbox on the left panel (under Log Search).
Testing Emergency Inbox
For testing the Emergency Inbox, you can deadhead the SMTP delivery address by changing the delivery server to 1.2.3.4 This will spool and defer the messages to the Emergency Inbox. Ensure that all accounts needed are set to minimum access level of End-user and are created (per the timing).
If you have an extra domain to test on, you can simply add an alias to your primary domain account.
To test the inbox:
- Navigate to Account Management > Domains.
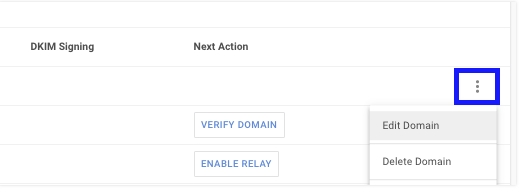
- For the desired domain, click the more options icon and then select Edit Domain.

- Ensure to copy the current settings and save them somewhere.
- For Delivery Destination, enter 1.2.3.4 or any other bogus IP address.
This field must have an IP, it cannot be left blank. Please ensure a destination is set. Do not leave blank, as this will hard reject messages. Due to testing, please remember this will take the required update cycle before we start trying to deliver to 1.2.3.4 (or your destination).
- Click Save.
- When your done testing, reverse the changes made.
Administrators can only view their Emergency Inbox. They cannot view any user's messages. You can verify messages should be going to the Emergency inbox via the logs
To send a message using the Emergency Inbox:
- Click Create a new message icon.
- Enter the recipient.
- Enter the subject and message body.
- Click Send now.
Do note: You cannot send attachments larger than 50mb in size while using the Emergency Inbox.
To reply to a message using the Emergency Inbox:
- Click the Reply to sender icon.
- Enter the message body.
- Click Send now.
Spooling Alert
Please see this dedicated KB on Spooling Alert Set-up.
Functional Accounts and Distribution Lists cannot view the emergency inbox. However please do not despair, mail will not be lost for these mailboxes. Once your server is back up and running deferred mail will be delivered