How to edit Safe and Blocked Sender Lists
| Situation | You have identified domains and/or accounts which you would like to bypass spam scanning or go straight to Quarantine. |
|---|---|
| Solution |
Go to Security Settings -> Email -> Sender Lists and enter preferences based on the below options. You can either:
|
Mail flow order
One key thing to note prior to this is to know the mail flow order. See t his KB on the Mail flow order.
The approve and block sender list are part of the Filters. Some items cannot be bypassed for scanning.
This KB is focused on adding to the sender list. If you need to create a filter, please see this KB: Safelisting Addresses
- Navigate to Security Settings > Email > Sender Lists.
- Both lists are available on this page. On the top is the Blocked Sender List, and the bottom is the Safe Sender List.
Blocked Senders: Messages from addresses or domains (Only Org Admins can add domains using wild cards) that you include on the Blocked Sender list WILL be quarantined.
Safe Senders: Messages from addresses or domains (Only Org Admins can add domains using wild cards) that you include on the Safe Sender list WILL NOT be quarantined. - To add addresses (e.g., emailaddress@domain.com, ) or IP addresses to the list, type them in the text box and use a line, comma or semi-colon to separate entries. IP addresses and CIDR notation (e.g., 10.0.62.0/24).
- Click Save.
CIDR notation
The Proofpoint Essentials service does not allow any specified CIDR range larger than a /24 network. Alternatively, for a /24, you can use the format: 10.0.0.*
If you need allow a network like: 10.10.0.0/16, you can use the format: 10.10.*.*
Order within list
We have noted that in the sender list itself, there is a hierarchy. Please see this KB on the filter order hierarchy.
For example, a CIDR block list entry is lower than a safe-listed SMTP address.
Adding from Logs
Adding IPs cannot be done from the logs and has to be manually done via the sender list page itself.
To avoid creating conflicting filters, this action can only be performed if a previous filter was not used.
- Under Tools click Log Search.
- From the logs page, do your search.
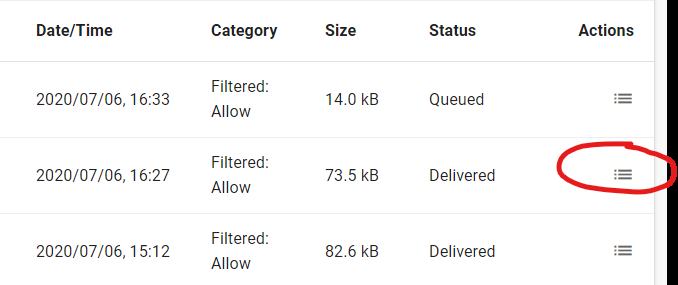
- Under Actions, click Details.

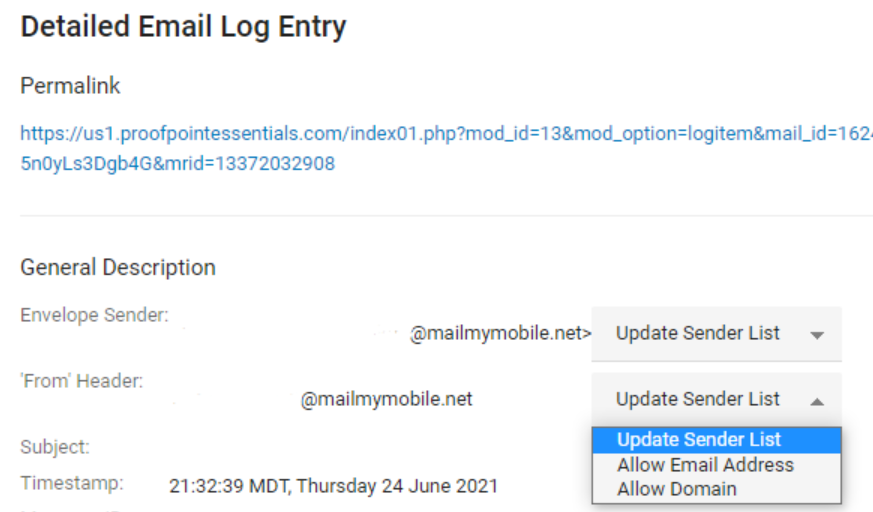
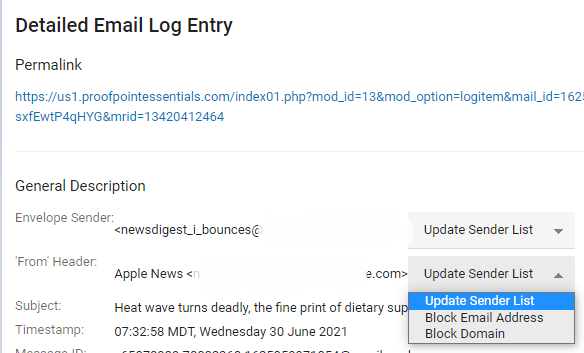
- Depending on what you searched for, drop down menus will appear on certain items
- Envelope Sender - not the same as the 'from.' This is typically used on mailing lists.
- 'From' Header - this is what you see on the from line in the message header
- Recipient - this is who the message is sent to.
- Pending the action you chose, it will open the Sender List page and add to the proper list.
If the email has been Quarantined it is possible to:
- Allow this address.
- Allow this domain

If the email address has been delivered, it is possible to:
- Block this address
- Block this domain

- Click Save to save your changes.
Users add entries to their sender lists via the digest. Admins can review specific user's sender lists.
- Go to User Management > Users
- Find the email address in question, and click on it (or the pencil icon).
- At the top a new set of items appear. Click Sender Lists.

- The page resembles the Global Sender Lists.
- You can add and remove entries as needed at the user level.
- Make sure to Save once done editing.