Building and Sending Reports in Proofpoint Essentials
| Situation | Customer wants to create, view, or schedule a report in Proofpoint Essentials. |
|---|---|
| Solution | See instructions below to learn how to set a report as a favorite and schedule it for regular delivery. |
Building Reports in Proofpoint Essentials
Prior to sending reports, you need to build a report first.
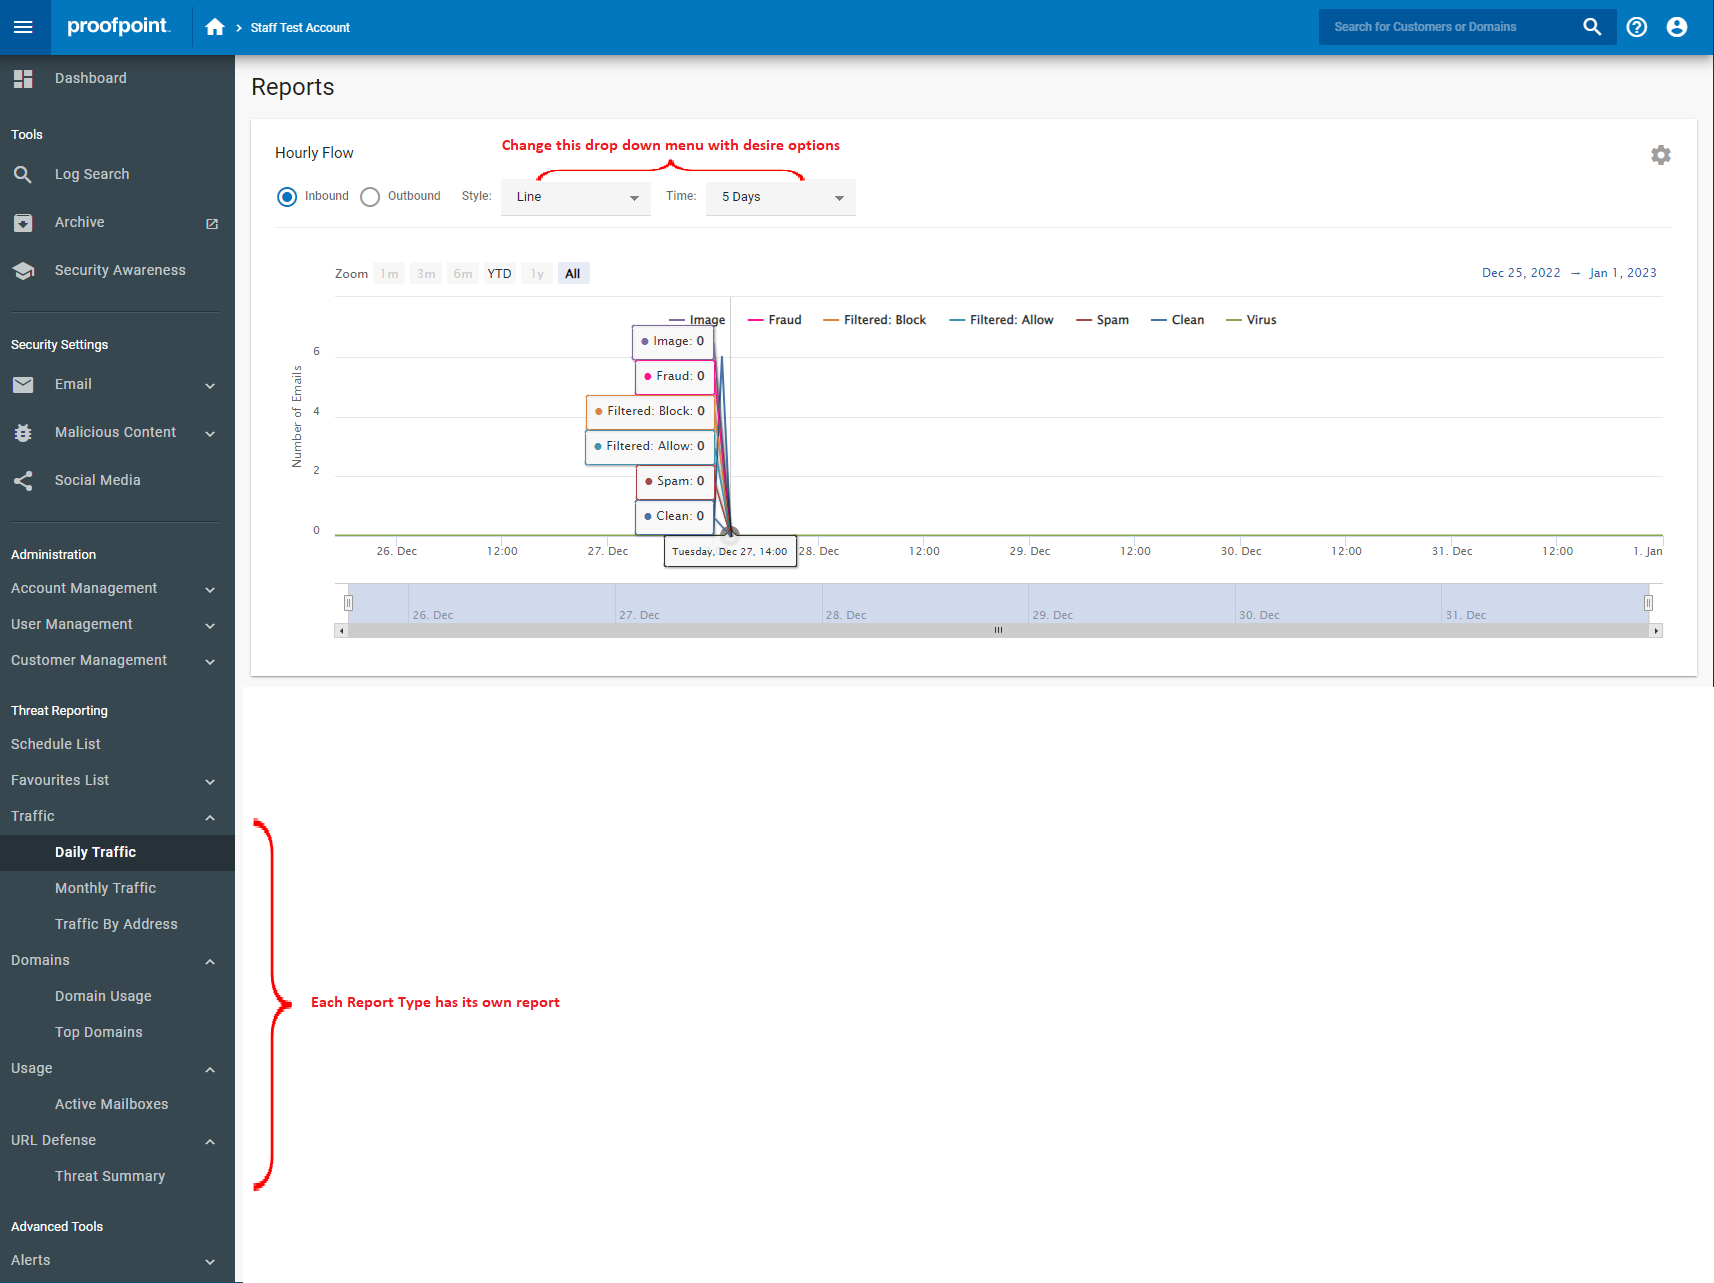
- Navigate to Threat Reporting section in the left panel.
- Select the report you want to view. (Traffic, Bandwidth, Domain, Usage, URL Defense)
- Configure the report as desired based on available options.
- In the upper left, click the gear icon to save report as a favorite.
- The report must be a favorite in order for you to schedule a report.
- Give the report a Name.
See Pictures Bellow
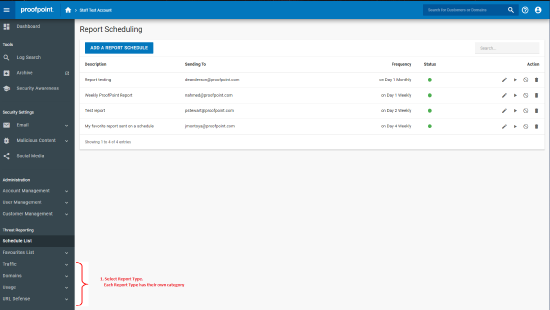
Once you save your first report, on the left you will see a new category called Favorites List. Here is where you will find all your saved reports.
Scheduling & Sending Reports
Please ensure you have a favorite report first. If you do not, you cannot schedule anything.
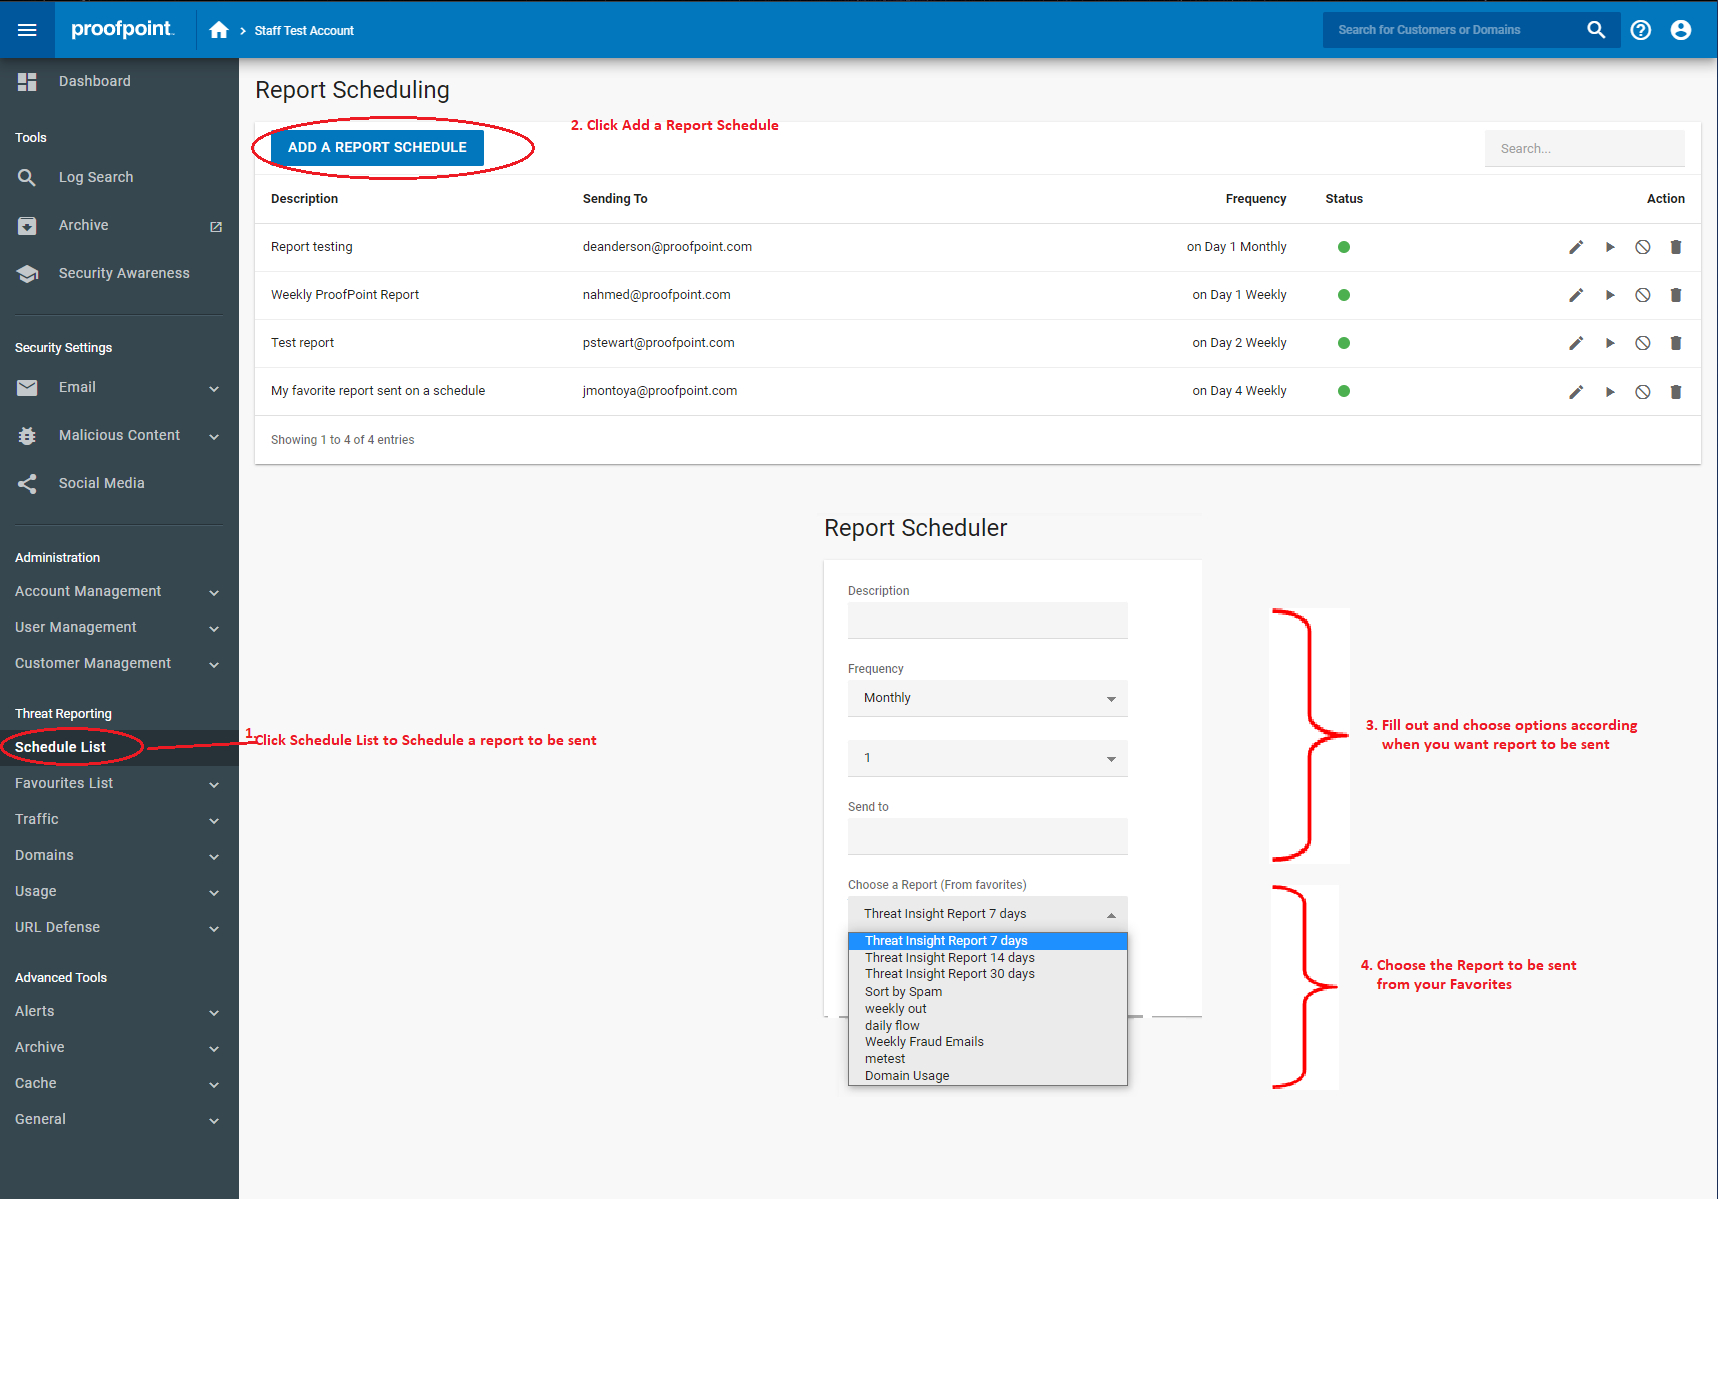
- Navigate to Reports > Schedule List.
- Click Add a Report Schedule.
- Provide a Description of your report.
- Select the desired Frequency from the drop down menus.
- Monthly - need to choose a specific date.
- Weekly - choose the specific date of the week.
- In the Send To field, enter the desired email address.
- From the Choose a Report dropdown, select the desired (Favorite) report.
- Click Save.
You will now receive the report via e-mail.